Veeam Vanguard Summit 2019 – Backup and Replication v10 - file share backups
One of the awesome things about being a member of the Veeam vanguard programme is the option of attending events like the Veeam Vanguard summit and not only catching up with some incredibly telaneted people but also learning about some of the things Veeam has planned and seeing demos of some of the latest features and plans.
One of the things Veeam have been talking about a lot is Veeam Backup and Replication, Version 10 (hereafter referred to as just V10). This version has many impressive features included and I want to go through some of them over future blog articles. For this article, I want to look at NAS and file share backups and I was able to download veeam backup and replication version 10 to test out this feature and several others.
NAS backups are something that has been asked for many times over the years as NAS devices are still heavily in use even though things like file shares can be run from a VM, NAS devices are still heavily in use and will continue to be so for many years to come.
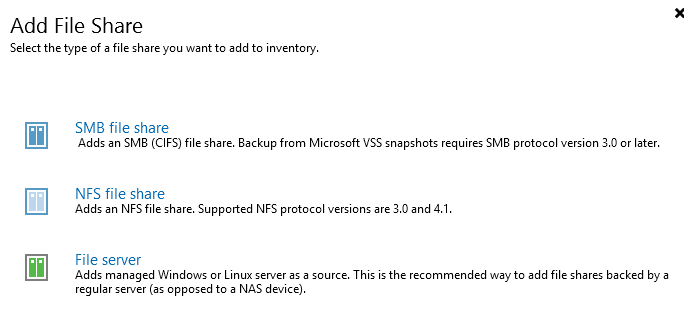
Adding in a file share using Veeam V10 is easy enough to do; the V10 interface has a new file shares option section:
Note that the TDB elements are there just to show that this may not be the final wording.
Clicking on “add file share” shows that V10 caters for both the Windows and Linux worlds as well as the NAS world.
For my test run, I wanted to back up a share on a FreeNAS server so I selected the SMB option and added in a user account with the rights to access the data.
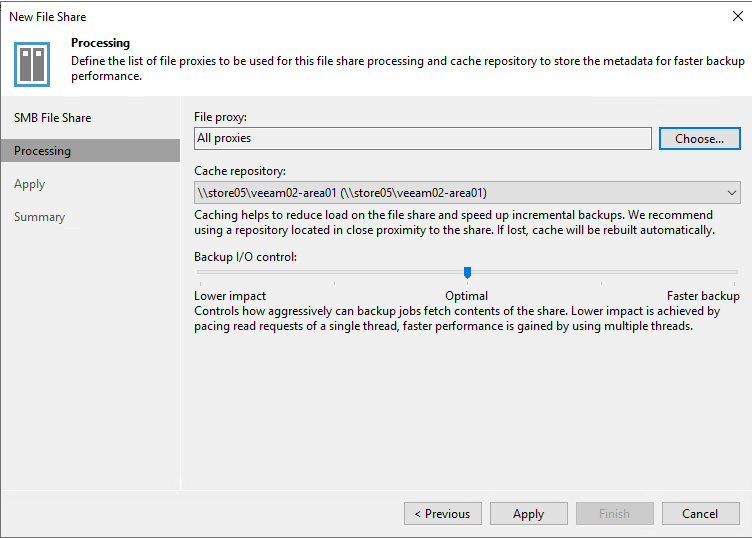
For this backup I am going with the defaults of “all proxies”, in this case I only have one proxy and that is on the veeam server itself. For future testing, I will try out other proxies to see how the offloading works but I do not suspect that there will be any issues.
The cache is effectively the meta data of the backup – the file and folder names. I choose to have that in the same location as the backup data itself. The lab is on a fairly flat network so there is not much performance difference. For a production network and different locations, you want the cache to be as close to the people doing the restore as possible.
For the backup I/O control, I am also going to go with the defaults here.
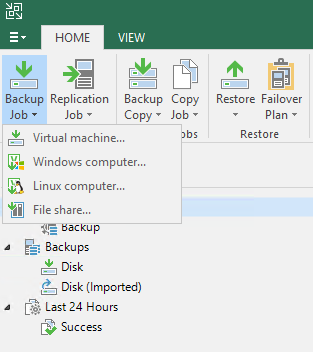
Finally, I need to create the backup job itself which is an option under “backup job” on the main menu.
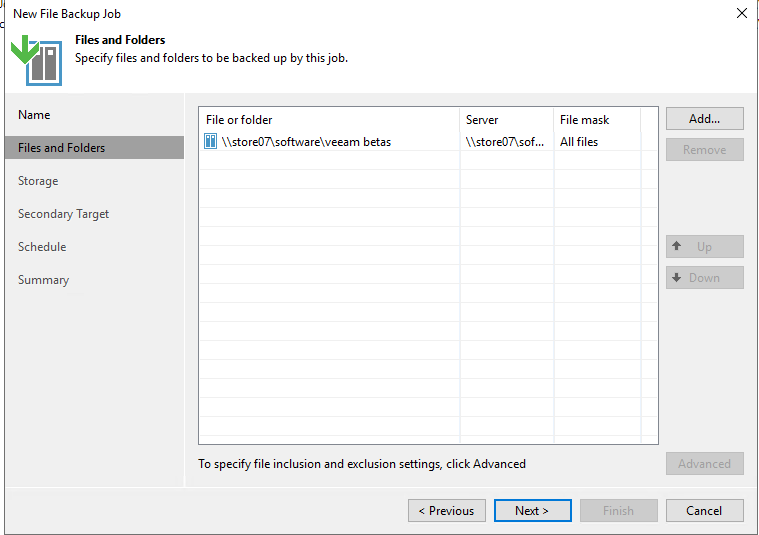
Creating the file backup job provides the option of including or excluding certain file types, for example, it would be possible to exclude any .MP3 or .SWP files. For this example, I will let it backup everything.
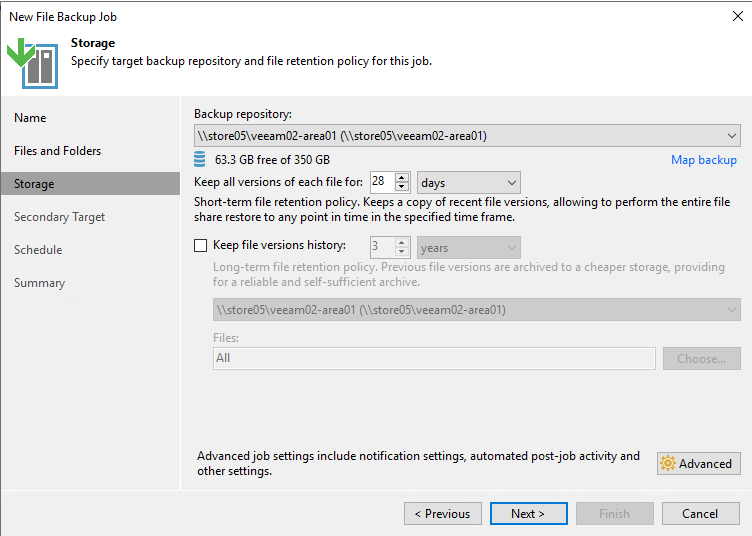
The next page provides options around file versioning and how long to keep the data for. I am going to go with the defaults again.
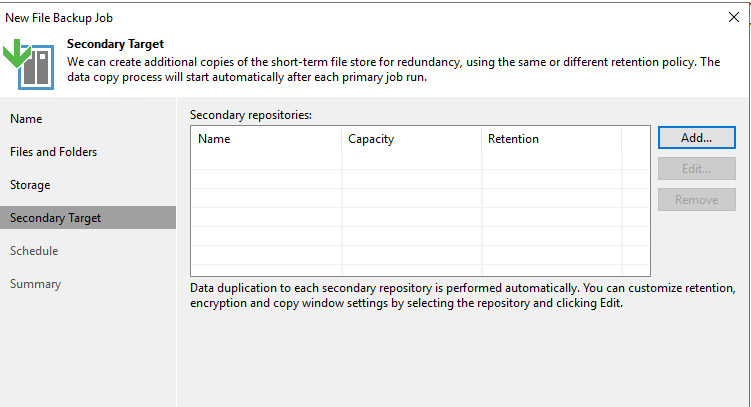
The next page allows for secondary repositories to be used for the backup, these can be on prem, another site or cloud based. For this backup I will not be using secondary targets. This is something I will cover in a future blog.
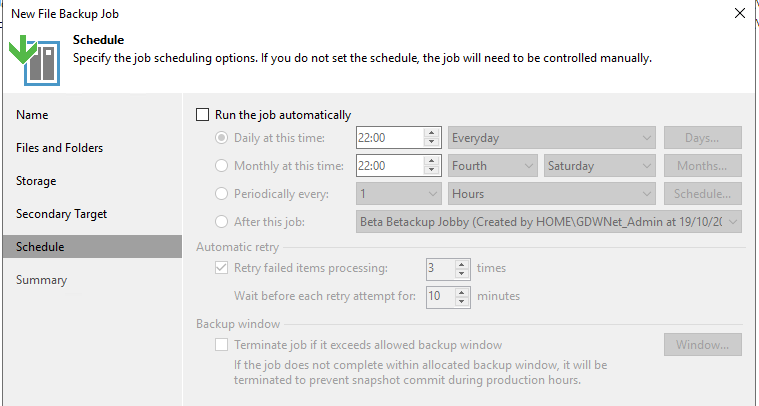
Finally, it is just a matter of setting a schedule. For this backup I will not be using a schedule.
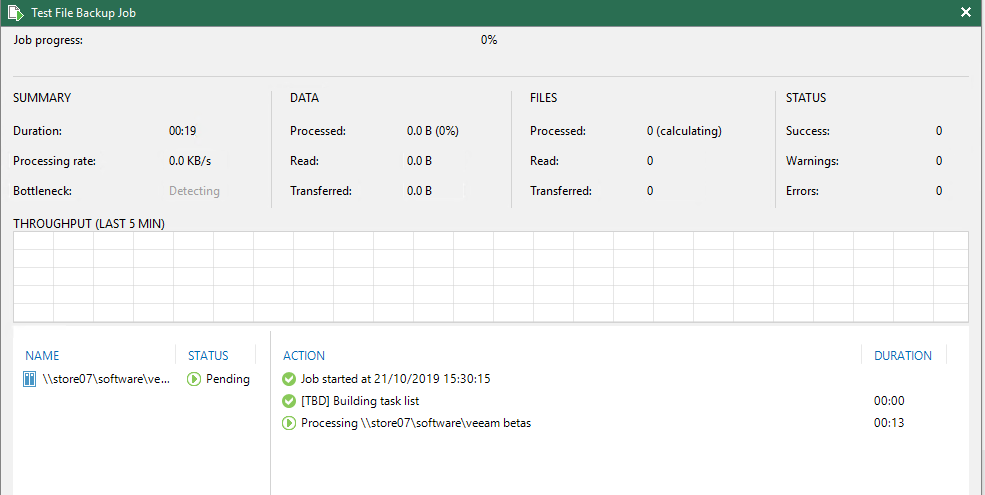
From this point, the backup looks just like any other veeam backup.
And the backup summary is just the same, as this is the first backup of the NAS area I have picked, the transfer size is quite large.

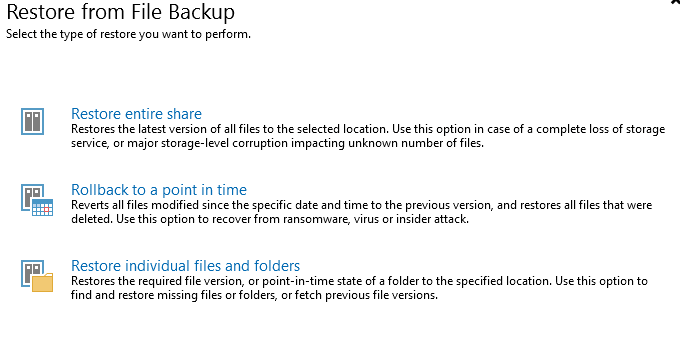
Restoring works in exactly the same as with virtual machines, you just need to select Restore -> File Share and then select the type of restore you want:
And once you have selected the restore type and the date you want the data from, you just let veeam do its thing.
So far, the few tests I have done with file share back up and restore have all worked flawlessly. I want to put in a couple of aggressive schedules to test out point in time restores and a few other things but what I have seen so far I am quite impressed with and I'm looking forward to seeing and sharing what else V10 has to offer.
Subscribe to Ramblings of a Sysadmin
Get the latest posts delivered right to your inbox

